2026. 3. 10. 20:59ㆍ스파르타코딩클럽 Spring4기 내일배움캠프
오늘은 과제를 푸는 시간을 가졌습니다.
단계 1-1. 카카오맵에서 요청 사항 분석하기
이번 단계의 목적
- HTTP / API 개념 복습
- 브로우저 개발자 도구(F12)를 사용하여 실제 현업에서 사용하는 API 요청 / 응답 구조를 이해하고 식별해 보기

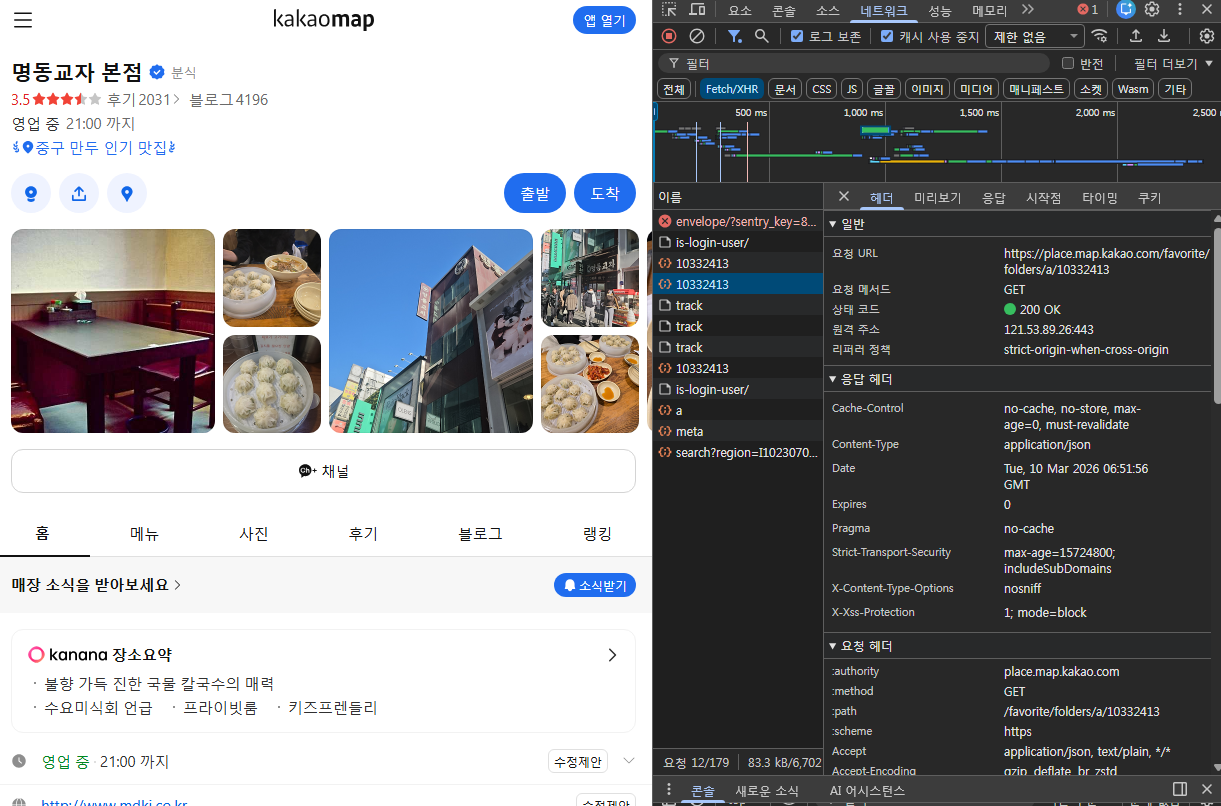
Fetch 부분에서 Headers에 있는 내용을 분석해 보았습니다.
| 항목 | 내용 |
| URL | https://place-api.map.kakao.com/places/panel3/10332413 |
| Method | GET |
| Status Code | 200 OK |
| Content-Type | application/json |
이 API는 어떤 요청을 받아 어떤 응답을 주는가?

-> 클라이언트가 panel3에 있는 10332413번의 json 데이터 조회 요청을 보내면
   , 서버는 200 OK와 함께 json 타입의 응답을 반환한다.
단계 1-2. 프론트 구현해 보기
이번 단계의 목적
- HTML / CSS 각각의 역할을 이해해 보기
- AI 활용방법 익히기
// HTML 의 역할이 무엇일까요?
-> 웹 페이지의 구조(뼈대)를 만들어주는 역할

// CSS 의 역할이 무엇일까요?
-> HTML로 구현된 구조(뼈대)에 디자인과 배치를 해주는 역할
1. HTML로 화면 구조 잡기
- AI에게 아래 프롬프트로 요청해 보세요.
맛집 목록을 보여주는 HTML 페이지를 만들어줘.
맛집 카드 목록 영역과 맛집을 등록하는 입력 폼이 있어야 해.
외부 라이브러리 없이 순수 HTML 사용해줘.
<HTML 코드 전문>
<!DOCTYPE html>
<html lang="ko">
<head>
    <meta charset="UTF-8">
    <meta name="viewport" content="width=device-width, initial-scale=1.0">
    <title>나만의 맛집 지도</title>
</head>
<body>

<div class="container">
    <header>
        <h1> 나만의 맛집 리스트</h1>
        <p>기억하고 싶은 맛집을 기록해보세요!</p>
    </header>

    <section class="form-section">
        <h3>새로운 맛집 등록</h3>
        <div class="form-group">
            <input type="text" id="resName" placeholder="식당 이름 (예: 중앙 식당)">
            <input type="text" id="resCategory" placeholder="카테고리 (예: 한식, 일식)">
            <textarea id="resReview" rows="3" placeholder="한 줄 평이나 추천 메뉴를 적어주세요."></textarea>
            <button onclick="addRestaurant()">등록하기</button>
        </div>
    </section>

    <section class="list-section" id="restaurantList">
        <div class="restaurant-card">
            <span class="category">한식</span>
            <h3>맛있는 김치찜</h3>
            <p> 서울특별시 어딘가</p>
            <p> 묵은지가 정말 제대로예요. 밥 두 공기 순삭!</p>
        </div>
    </section>
</div>
</body>
</html>
// *Gemini Pro를 이용하여 구현하였습니다.*
2. CSS로 꾸미기
- AI에게 아래 프롬프트로 요청해 보세요.
위 HTML에 CSS를 추가해줘.
맛집 목록은 카드 형태로 보이고, 전체적으로 깔끔한 스타일이면 좋겠어.
<CSS 코드 전문>
:root {
  --primary-color: #ff6b6b;
  --bg-color: #f8f9fa;
  --card-bg: #ffffff;
}

body{
    font-family: 'Pretendard', sans-serif;
    background: var(--bg-color);
    margin: 0;
    padding: 20px;
    color: #333;
}

.container {
    max-width: 800px;
    margin: 0 auto;
}

header {
    text-align: center;
    margin-bottom: 30px;
}

.form-section{
    background: var(--card-bg);
    padding: 20px;
    border-radius: 12px;
    box-shadow: 0 4px 6px rgba(0,0,0,0.1);
    margin-bottom: 30px;
}

.form-group{
    display: flex;
    flex-direction: column;
    gap: 10px;
}

input, textarea{
    padding: 12px;
    border: 1px solid #ddd;
    border-radius: 6px;
    font-size: 16px;
}

button{
    background-color: #ff6b6b;
    color: white;
    border: none;
    padding: 12px;
    border-radius: 6px;
    cursor: pointer;
    font-weight: bold;
    transition: background 0.3s;
}

button:hover{
    background-color: #fa5252;
}

.list-section{
    display: grid;
    grid-template-columns: repeat(auto-fill, minmax(300px, 1fr));
    gap: 20px;
}

.restaurant-card{
    background: var(--card-bg);
    border-radius: 12px;
    padding: 20px;
    box-shadow: 0 2px 4px rgba(0,0,0,0.05);
    border-left: 5px solid var(--primary-color);
}

.restaurant-card h3{
    margin: 0 0 10px 0;
    color: var(--primary-color);
}

.restaurant-card p{
    margin: 5px 0;
    font-size: 14px;
    color: #666;
}

.category{
    display: inline-block;
    background: #eee;
    padding: 2px 8px;
    border-radius: 4px;
    font-size: 12px;
    margin-bottom: 10px;
}
// *Gemini Pro를 이용해서 구현하였습니다.*
<!DOCTYPE html>
<html lang="ko">
<head>
<meta charset="UTF-8">
<meta name="viewport" content="width=device-width, initial-scale=1.0">
<title>나만의 맛집 지도</title>
<link rel="stylesheet" href="style.css"> // 외부의 CSS 연결 부분
</head>
<body>HTML에서 외부의 CSS 연결을 하여 사용하였습니다.
단계 1-3. API 호출해보기
이번 단계의 목적
- 내가 만든 화면에서 실제로 서버에 요청을 보내고 응답을 받아보는 경험 해보기
- 프론트를 구성하는 JS의 역할 이해하기
// JS의 역할이 무엇일까요?
-> 사용자의 상호작용을 감지하여 함수를 실행하고, 그 결과로 화면(DOM Control)을 바꾸거나 서버와
통신하게 해주는 역할
(HTML의 구조를 동적으로 변경하는 역할)
// API 란 무엇일까요?
-> 프로그램이 다른 프로그램의 기능/데이터를 이용하기 위해 제공되는 인터페이스이자
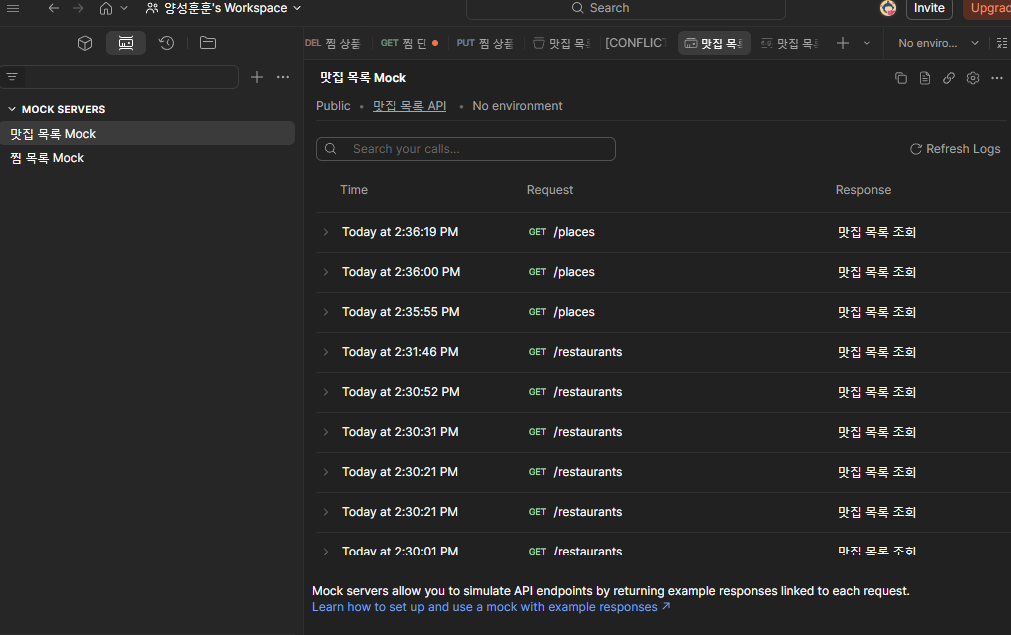
, 요청/응답 규약(규칙)이다.3-1. Postman Mock 서버 만들기
1. Postman에서 새 Collection을 생성하기
먼저 Postman을 사용하기 위해서 Mock 서버를 먼저 만들어서 URL을 복사하였습니다.
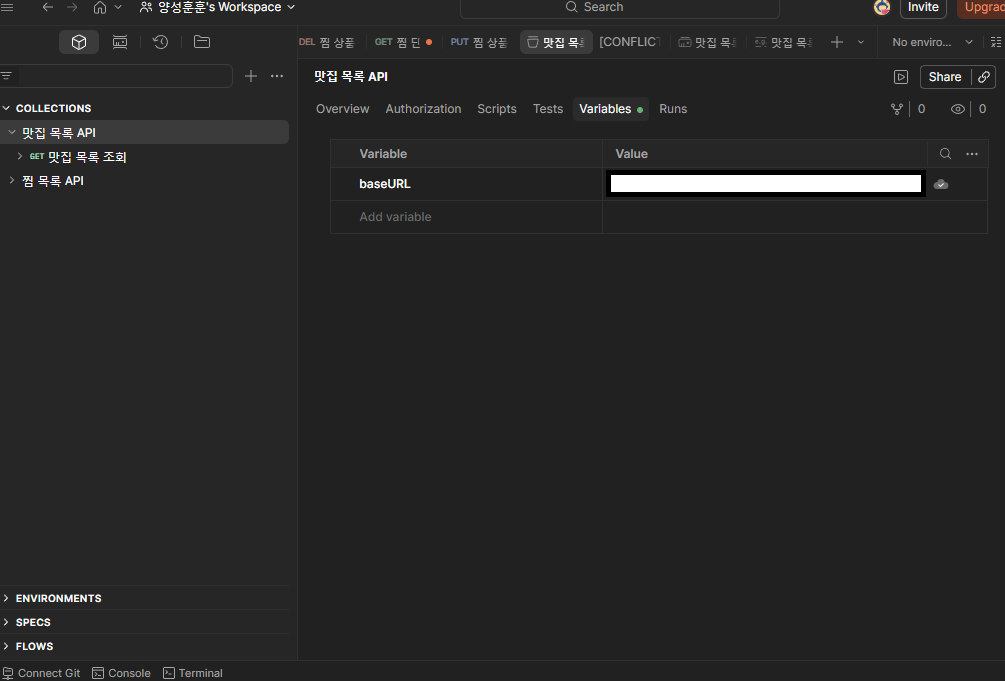
이후 생성한 콜렉션에 baseURL이라는 변수를 만들어 Mock Server 주소를 넣어줬습니다.
2. 맛집 [전체 조회] API를 아래와 같이 추가하기
| 항목 | 내용 |
| Method | GET |
| URL | /places |

위에서 만든 콜렉션에 Request를 새로 만들어서 GET Method를 baseURL(MockServerURL)/places에게 요청할 준비를 하였습니다.
3. Example 응답 작성

받은 Request를
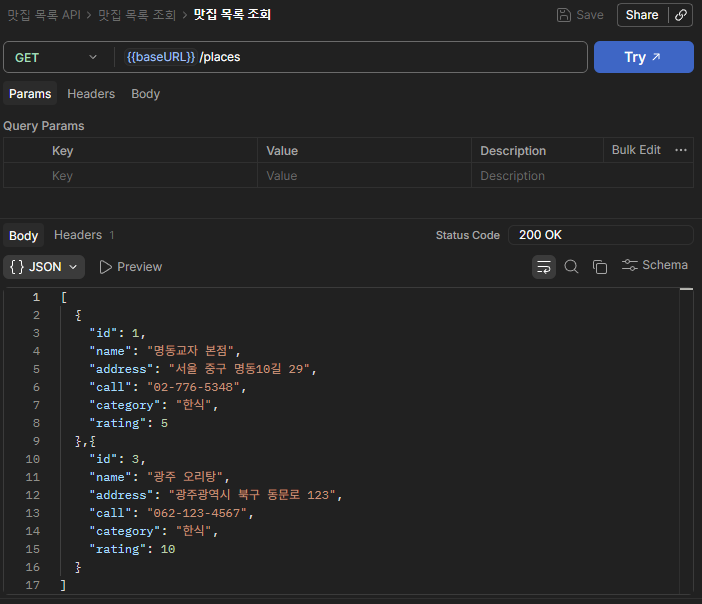
미리 받은 Example용 json을 넣어서 Status Code에 200 OK를 넣어줍니다.

이후 Requset에서 Send를 클릭해 주면 아래와 같이 나온다.

id와 함께 데이터들을 모두 가져오는 것을 볼 수 있다.
이것으로 Postman에서 직접 요청을 보내 Example대로 응답을 받았습니다.
3-2. 구현한 프론트와 연동하기
1. index.html 에 JavaScript를 추가합니다.
<body>
<div class="container">
...
</div>
	<script src="app.js"></script>	// 외부의 JS 연결 부분
</body>
</html>
같은 폴더 내에 app.js 파일을 만들고 외부에서 연결하는 방식으로 하였습니다.
2. AI에게 아래 프롬프트로 요청해보세요.
아래 Mock 서버 URL로 GET 요청을 보내서
응답받은 맛집 목록을 HTML 카드로 화면에 렌더링하는 JS 코드를 짜줘.

Mock 서버 URL: [복사한 URL 붙여넣기]
// 1. 서버 URL (엔드포인트가 있다면 뒤에 추가하세요)
const API_URL = '목 서버 주소/places';

// 페이지가 로드되면 데이터를 가져옵니다.
document.addEventListener('DOMContentLoaded', () => {
    fetchRestaurants();
});

// 2. 서버에서 데이터 가져오기
async function fetchRestaurants() {
    try {
        const response = await fetch(API_URL, {
            method: 'GET',
            headers: {
                'Content-Type': 'application/json'
            }
        });
        const data = await response.json();

        // 만약 데이터가 객체 안에 감싸져 있다면 (예: data.stores) 구조에 맞춰 수정하세요.
        // 여기서는 data 자체가 배열인 경우를 가정합니다.
        data.forEach(item => {
            renderCard(item.name, item.address, item.call, item.category, item.rating);
        });
    } catch (error) {
        console.error('데이터 렌더링 중 오류 발생:', error);
    }
}

// 3. 데이터를 받아 카드를 생성하고 화면에 붙이는 함수
function renderCard(name, address, call, category, rating) {
    const list = document.getElementById('restaurantList');

    // 새로운 카드 엘리먼트 생성
    const card = document.createElement('div');
    card.className = 'restaurant-card';

    // HTML 구조 삽입 (index.html의 기존 양식 활용)
    card.innerHTML = `
        <span class="category">${category}</span>
        <h3>${name}</h3>
        <p> ${address || '주소가 없습니다.'}</p>
        <p> ${call || '번호가 없습니다.'}</p>
        <p> ${rating || '점수가 없습니다.'}</p>
    `;

    // 목록의 맨 뒤에 추가 (서버 데이터 순서대로)
    list.appendChild(card);
}

// 4. (기존 유지) 직접 등록 기능
function addRestaurant() {
    const name = document.getElementById('resName').value;
    const category = document.getElementById('resCategory').value;
    const address = document.getElementById('resAddress').value;
    const call = document.getElementById('resCall').value;
    const rating = document.getElementById('resRating').value;

    if (!name || !category) {
        alert("식당 이름과 카테고리를 입력해주세요!");
        return;
    }

    // 직접 등록은 맨 위에 보이도록 prepend 사용
    renderCard(name, address, call, category, rating);

    // 입력창 초기화
    document.getElementById('resName').value = '';
    document.getElementById('resCategory').value = '';
    document.getElementById('resAddress').value = '';
    document.getElementById('resCall').value = '';
    document.getElementById('resRating').value = '';
}
// *Gemini Pro를 이용해서 구현하였습니다.*- 서버 URL 작성해줘야 하는데 이때 엔드포인트를 까먹지 않고 작성해야합니다. 저 같은 경우에는 places로 해주었기때문에 places를 붙여주었습니다.
- 서버에서 데이터를 조회하는 GET을 이용할 것입니다. 원래 코드에서 GET이 안보여서 AI에게 물어본 결과 밑의 두 코드는 같은것으로 fetch를 사용할때 아무 매개변수를 적지않으면 기본적으로 GET 메서드를 사용하도록 설계되어 있다고 합니다.
const response = await fetch(API_URL, {
            method: 'GET',
            headers: {
                'Content-Type': 'application/json'
            }
        });
const response = await fetch(API_URL); // 위 코드와 같다.
이제 브라우저에서 Mock Server에 있는 예제를 잘 가져오는지 보겠습니다.

위에 Postman에서 Example의 Body에 넣어놓은 데이터가 잘 불러와지는 것을 볼 수 있었습니다.
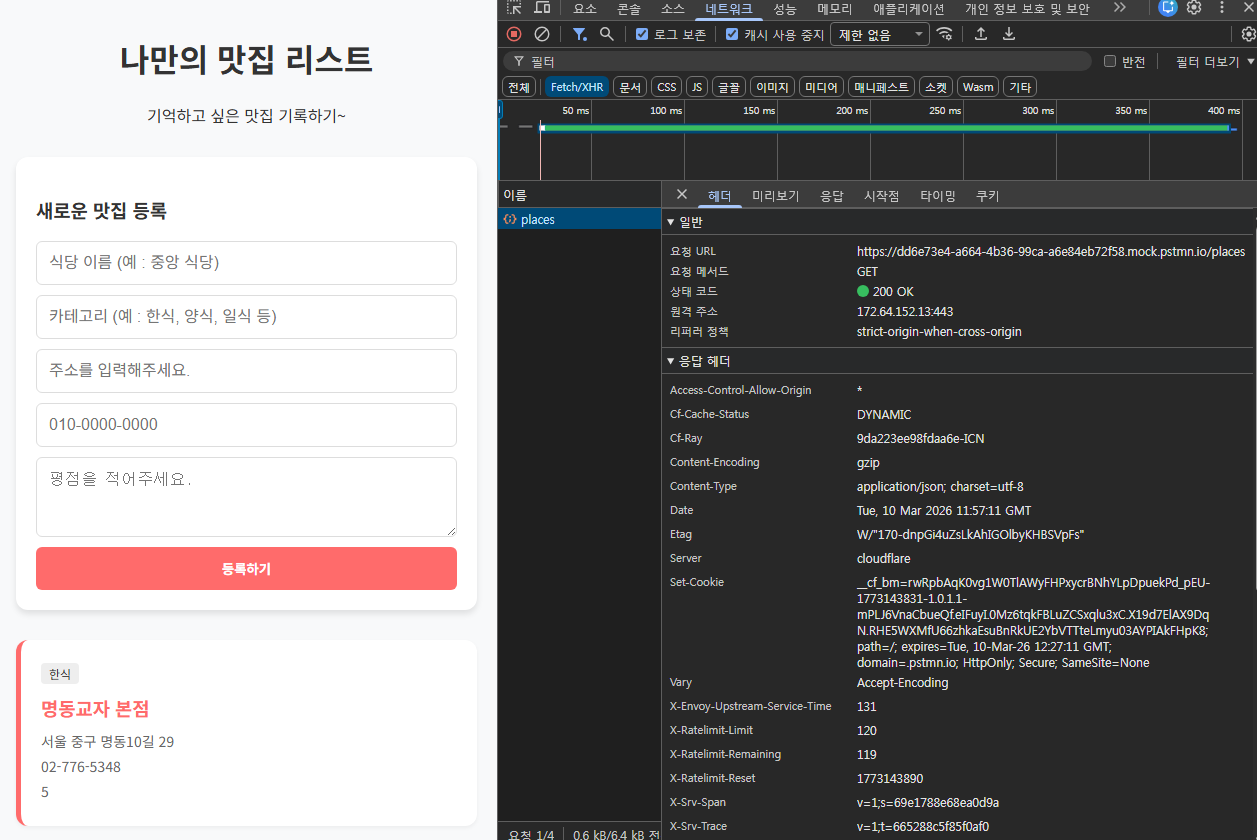
상태 코드 200 OK를 받는 것도 확인했습니다.
오늘의 TIL은 이상이며 내일은 API 명세서 만들기와 CRUD 직접 구현해 보기를 통해서 가상의 백엔드 서버와 연결까지 해보는 걸 해보겠습니다.
'스파르타코딩클럽 Spring4기 내일배움캠프' 카테고리의 다른 글
| (내일배움캠프)260316 TIL (0) | 2026.03.16 |
|---|---|
| (내일배움캠프)260312 TIL (0) | 2026.03.12 |
| (내일배움캠프)260311 TIL (0) | 2026.03.11 |